When a crisis hits, the strength of a community is truly revealed. While personal preparedness is vital, a successful emergency evacuation relies on neighbors helping neighbors and clear, shared information. Your family’s plan is the first building block of a resilient community. When you know your routes, have your supplies ready, and can communicate your status, you not only protect your loved ones but also reduce the strain on first responders. This allows them to focus on those who need the most help. Let’s explore how to build a personal plan that contributes to a safer, more connected community response during a large-scale evacuation.
Key Takeaways
- Plan for people, not just places: A solid evacuation plan accounts for reuniting your family with designated meeting spots, a communication hub, and clear roles for everyone, so you can work together under pressure.
- Prepare your go-bags for every family member: Pack kits with at least three days of essentials like water, food, medications, and important documents. Remember to create specialized bags for pets and anyone with unique medical needs so you can grab them and go without hesitation.
- Treat your plan as a living document: A plan on paper is useless without practice. Run drills twice a year to build muscle memory and review your entire plan every six months to update contact info, routes, and expired supplies in your kits.
What Is an Emergency Evacuation?
At its core, an emergency evacuation is the urgent process of moving people away from an area to protect them from an immediate threat. It’s a coordinated move to safety when staying put is no longer the safest option. The scale of an evacuation can vary dramatically. It might be a small-scale event, like leaving a single building due to a fire, or a massive undertaking, like an entire city moving inland to escape a hurricane.
Evacuations are triggered by a wide range of dangers. While we often think of natural disasters like floods, wildfires, and earthquakes, they can also be necessary for man-made crises. These include chemical spills, industrial accidents, or major transportation emergencies. The goal is always the same: to get everyone out of harm’s way as quickly and safely as possible. This is why having a clear plan is so critical, especially when you need to report an incident and get information out to your community fast.
A successful evacuation plan also accounts for everyone’s needs. This means considering family members with disabilities, young children, and pets who may require extra assistance or specialized equipment to leave safely. Preparing ahead of time by creating a plan and packing an emergency kit, often called a “go-bag,” ensures you have the essential supplies to sustain your family until you reach safety or help arrives.
What Triggers an Evacuation?
An evacuation order means there is an immediate threat to your safety, and you need to leave the area. While it’s easy to think “it won’t happen to me,” understanding the types of events that can force you from your home is the first step toward being truly prepared. These triggers generally fall into three main categories: natural disasters, man-made threats, and public health emergencies. Each one presents unique challenges, but knowing what you might face helps you create a more flexible and effective evacuation plan for your family.
Natural Disasters
Nature’s power is the most common reason for large-scale evacuations. Events like hurricanes, wildfires, floods, and earthquakes can make entire regions unsafe in a matter of hours. A volcano eruption can blanket towns in ash, while a tsunami can arrive with little warning after a quake. In these situations, officials issue evacuation orders to move people out of harm’s way before conditions become life-threatening. You can often track the progression of events like wildfires or
Man-Made Threats
Unfortunately, not all disasters are natural. Man-made threats can be just as dangerous and often happen without any warning. These include industrial accidents like chemical spills or nuclear plant emergencies, which can release hazardous materials into the air, water, or soil. Major transportation incidents, such as a train derailment involving toxic substances or a large-scale highway crash, can also require nearby residents to evacuate. If you witness an accident or a hazardous spill, reporting an incident quickly can help alert authorities and your community, potentially saving lives by giving everyone more time to get to safety.
Health Emergencies
While less frequent, public health crises can also trigger evacuations. This might happen during a severe disease outbreak where moving people from a densely populated hot zone is necessary to stop the spread of illness. In other cases, an evacuation might be needed to move vulnerable individuals away from an area with a compromised water supply or other environmental health hazard. These situations require careful management to ensure the evacuation itself doesn’t worsen the crisis. During these events, effective volunteer coordination becomes essential for distributing supplies, sharing information, and supporting community members who need assistance.
Create Your Family’s Evacuation Plan: A Step-by-Step Guide
Thinking about emergencies can be stressful, but creating a family evacuation plan is one of the most empowering things you can do to protect your loved ones. A solid plan turns panic into purpose, giving everyone clear steps to follow when seconds count. It doesn’t need to be a complicated document; it just needs to be simple, clear, and understood by every member of your household. By walking through the “what ifs” now, you build confidence and resilience for whatever comes your way. These seven steps will guide you through creating a practical plan that keeps your family connected and safe during an emergency.
Step 1: Map Your Evacuation Routes
When an evacuation is ordered, your usual route to work or the grocery store might be blocked or gridlocked. That’s why your plan needs options. Start by identifying the best route out of your neighborhood, and then find at least two alternatives. Think about different directions (north, south, east, west) and different types of roads. Use a physical map to draw these routes, and keep it in your emergency kit. While GPS apps are great, you can’t rely on them if cell service or power goes down. You can use PubSafe’s public map during an event to see real-time incident reports, which can help you choose the safest open route.
Step 2: Choose Your Meeting Points
If your family members are at school, work, and home when an emergency happens, you need a plan to reunite. Choose two meeting points. The first should be right outside your home, like a specific tree or a neighbor’s driveway. This is for sudden emergencies, like a fire, where you need to get out of the house quickly. Your second meeting point should be outside your immediate neighborhood, in case you can’t return to the area. This could be a library, a community center, or a relative’s house that is unlikely to be affected by the same emergency. Make sure everyone knows the address and location of these spots without needing to look them up.
Step 3: Create a Communication Plan
During a disaster, local phone lines and cell towers can quickly become overwhelmed, making it hard to reach family members nearby. A great strategy is to choose an out-of-state friend or relative as a central contact. It’s often easier to make a long-distance call than a local one in an emergency. Have every family member call or text this person to check in and share their status. Also, remind your family that text messages often get through when voice calls don’t. You can also use a community platform to report an incident or mark yourself as safe, keeping your wider community and local responders informed.
Step 4: Assign Roles and Responsibilities
When everyone knows their job, your evacuation will run much more smoothly. Assigning roles prevents confusion and ensures that critical tasks aren’t forgotten. For example, one adult can be in charge of grabbing the emergency kit and important documents, while another is responsible for getting the pets and their supplies. An older child can be tasked with grabbing their own go-bag and helping a younger sibling. Write these roles down as part of your plan. This approach mirrors how effective volunteer coordination works on a larger scale, ensuring everyone contributes efficiently.
Step 5: Plan for Special Needs and Pets
A complete plan accounts for every member of your family, including the ones with paws. If you have infants, elderly relatives, or family members with medical conditions, your emergency kit should include their specific supplies, like formula, medications, and medical equipment. Remember that most public shelters do not allow pets other than service animals. Research pet-friendly hotels or shelters outside your area ahead of time and add them to your plan. Prepare a separate go-bag for your pets with food, water, a leash, and a copy of their vaccination records. The Humane Society offers great checklists for this.
Step 6: Pack Your Emergency Kit
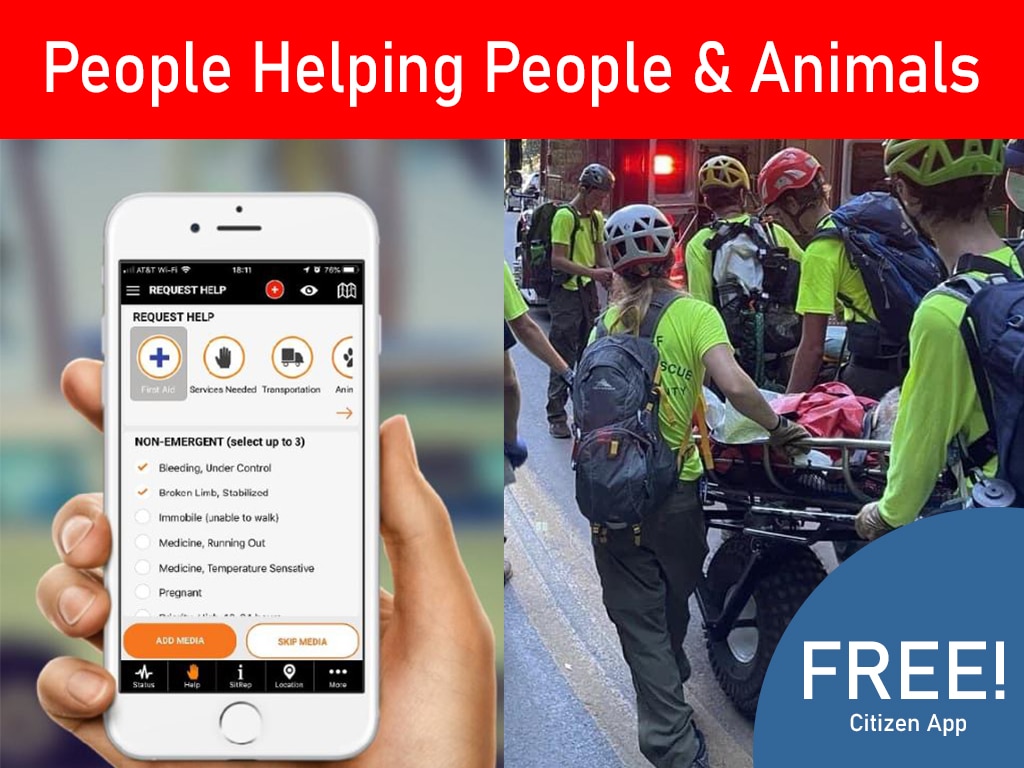
Your emergency kit, or “go-bag,” should be packed and ready long before you ever need it. This bag contains all the essentials you and your family would need to survive for several days. While we’ll cover the contents in more detail later, the key is to have it packed and stored in an easily accessible place, like a hall closet or garage. Many families keep a large kit at home and smaller versions in their cars. Part of your modern emergency kit should also include having the right apps on your phone. Install the free PubSafe app so you can receive alerts and communicate your status in real time.
Step 7: Practice Your Plan
A plan on paper is a good start, but a practiced plan is what really saves lives. You don’t want the first time you try your plan to be during a real crisis. At least twice a year, hold a family drill. You can make it a game for kids, timing how quickly everyone can get to the designated meeting spot. Walk through the steps, talk about each person’s role, and check your emergency kit to see if any supplies need to be replaced or updated. Practicing helps commit the plan to memory and allows you to fix any parts that aren’t working well. It turns a scary “what if” into a confident “we know what to do.”
What to Pack in Your Emergency Kit
When an evacuation order comes, you might only have minutes to leave. Having a pre-packed emergency kit, often called a “go-bag” or “72-hour kit,” is one of the most important steps you can take. The goal is to have everything you and your family need to be self-sufficient for at least three days. This is often how long it takes for official help to become widely available.
Store your kits in a cool, dark place that’s easy to grab on your way out, like a hall closet or the garage. It’s also smart to keep a smaller version in your car. Once you’ve packed your bags, you can use the PubSafe app to stay connected to community resources and report your status when you’ve reached safety.
Water and Food
This is the absolute foundation of your kit. Plan for one gallon of water per person, per day, for at least three days. For food, choose non-perishable items that don’t require cooking or refrigeration. Think protein bars, dried fruit, nuts, and canned goods with a pop-top lid. Don’t forget a manual can opener just in case. If you have infants or young children, pack formula, baby food, and any special dietary items they need. Remember to check and replace food and water every six months to a year to make sure everything is fresh and safe to consume.
Important Documents and Cash
In an emergency, you’ll need access to critical personal information. Gather physical copies of birth certificates, passports, social security cards, deeds, titles, and insurance policies. Place them in a waterproof, portable container. It’s also a great idea to have digital copies saved on a password-protected USB drive or secure cloud service. Don’t forget to include cash in small denominations. Power outages can render credit and debit cards useless, so having physical money is essential for buying gas or supplies. Having these items ready will save you from major headaches later on.
First-Aid Supplies and Medications
A well-stocked first-aid kit is non-negotiable. You can buy a pre-made one or build your own. Be sure it includes sterile bandages, antiseptic wipes, adhesive tape, pain relievers, and other basic medical supplies. The most important thing, however, is to include a supply of your personal medications. Pack at least a seven-day supply of any prescription drugs, along with a list of what they are, your dosage, and your doctor’s contact information. If you wear glasses or contacts, pack an extra pair. You can find a comprehensive first-aid kit checklist to help you get started.
Clothing, Gear, and Tools
Pack a change of clothes for everyone in the family, focusing on layers you can add or remove as conditions change. Include a jacket, long pants, a long-sleeved shirt, and sturdy, closed-toe shoes. A good pair of socks is more valuable than you might think. Your gear should also include essential tools for communication and safety. A hand-crank or battery-powered radio is crucial for receiving official updates when cell service is down. Also include a flashlight, extra batteries, a multi-tool, and a whistle to signal for help. A local map is also a great addition in case GPS is unavailable.
Supplies for Pets and Special Needs
Your family’s unique needs should shape your kit. If you have pets, their go-bag should include food, water, a leash, a carrier, and any medications. Most public shelters do not allow pets other than service animals, so you should plan for your pets ahead of time. For infants, pack diapers, wipes, and formula. For older adults or family members with disabilities, consider any mobility aids or medical equipment they rely on. Creating a personalized plan ensures that every member of your household, including the furry ones, is accounted for and safe during an evacuation.
Common Evacuation Plan Mistakes to Avoid
Creating a family evacuation plan is a huge step toward safety. But a plan is only as good as its details, and it’s easy to overlook a few key things that can make a big difference when seconds count. Let’s walk through some of the most common mistakes so you can be sure your plan is solid, practical, and ready for anything. By avoiding these pitfalls, you turn a good idea into an effective, life-saving strategy for your family.
Planning for Only One Type of Emergency
It’s natural to plan for the most obvious threat, like a house fire. But what if you’re facing a flood, a tornado, or a chemical spill nearby? Each disaster requires a different response. A wildfire might block your main exit route to the west, while a flash flood could make all low-lying roads impassable. Your plan needs to be flexible enough to handle multiple scenarios. This means mapping several escape routes and understanding the different actions required for various types of emergency evacuations. A comprehensive plan includes clear instructions and safe exit strategies for each type of threat relevant to your area, not just the one you think is most likely to happen.
Forgetting to Include Everyone
An evacuation plan is only successful if it works for every single person in your household. It’s easy to design a plan from your own able-bodied perspective, but you must consider the unique needs of children, elderly family members, and anyone with disabilities or medical conditions. Someone who has trouble walking will need a different kind of assistance and a different escape route than a toddler who needs to be carried. Walk through your plan from each person’s point of view. Do you need visual alarms in addition to audible ones for someone who is hard of hearing? Is there special equipment you should have ready? Your plan should explicitly assign a helper to anyone who might need assistance, ensuring no one is left trying to figure it out alone.
Skipping Practice Drills
A plan on paper is just a piece of paper. Practice is what turns it into a life-saving reflex. In the chaos of a real emergency, panic can make it hard to think clearly. People often hesitate when an alarm sounds, assuming it’s a false alarm or just a drill. Without practice, your carefully crafted plan can fall apart. Drills are your chance to find the flaws, like discovering your emergency kit is too heavy or that your kids don’t remember the meeting spot. Run through your evacuation plan at least twice a year. Make it a calm, focused activity, not a scary one. Time yourselves, try out your different routes, and talk about what worked and what didn’t. This practice builds the muscle memory your family needs to act quickly and confidently.
Letting Your Plan Become Outdated
Think of your evacuation plan like the software on your phone; it needs regular updates to function properly. Life changes, and so should your plan. A new baby, a change in a family member’s health, a move, or even local road construction can make parts of your plan obsolete. An old phone number for your out-of-state contact or an outdated meeting spot can cause dangerous confusion during a crisis. Schedule time to review your emergency plan every six months. Update contact lists, check the supplies and expiration dates in your go-bags, and drive your evacuation routes to check for closures. While a solid plan is your foundation, using a real-time tool like the PubSafe public map can also help you adapt if your primary route is suddenly blocked.
What to Do When You Evacuate
When the order comes to evacuate, it’s time to put your plan into action. The moments during an evacuation can be stressful, but knowing what to do can make all the difference. Focus on moving safely, staying connected, and helping those around you.
Follow Your Route and Stay Alert
Stick to the evacuation routes you mapped out in your plan. While it might be tempting to try a shortcut, official routes are chosen because they are the safest and most reliable paths away from danger. As you travel, stay informed by listening to a battery-powered or hand-crank radio for the latest updates from authorities. Be aware of your surroundings and watch for hazards like downed power lines, debris, or flooded areas. You can also use community-based tools like the PubSafe public map to see real-time reports of road closures and other dangers shared by officials and fellow citizens, helping you make safer travel decisions.
Stay Calm and Help Others
Keeping a level head is your greatest asset during an emergency. Panic can lead to poor decisions, so take a deep breath and focus on your plan. Your calm demeanor can also be a source of comfort for your family, especially children. Once you’ve ensured your own family is safe, think about your community. Check on neighbors, particularly those who are elderly, have disabilities, or might not have transportation. Offering a ride or a helping hand can make a life-changing impact. This spirit of mutual support is the foundation of effective volunteer coordination and builds a more resilient community for everyone.
Communicate Your Status in Real Time
Once you are safely on your way or have reached your destination, let your designated contacts know your status. Use your family’s communication plan to check in. If phone lines and cell networks are overloaded, text messages may still go through. This is also where a real-time coordination app becomes essential. With the PubSafe app, you can update your status to “Safe” so your family, friends, and any connected response teams can see you’re okay without needing to call or text. You can install the free app before an emergency to ensure everyone in your family is connected and can share their status instantly when it matters most.
How to Stay Informed During an Emergency
When an evacuation order is issued, the situation can change in an instant. What was a safe route a minute ago might be blocked, a designated shelter could reach capacity, or the threat itself could shift direction. Staying informed isn’t just about getting the initial alert; it’s a continuous process of gathering the most current information to make the safest decisions for your family. In a high-stress scenario, feeling in control of your access to information can reduce anxiety and help you think more clearly. Relying on a single source can leave you with an incomplete or outdated picture.
That’s why a multi-layered approach is best. You need the authoritative guidance from official channels combined with the on-the-ground reality provided by real-time community updates. This combination gives you the most complete view of what’s happening, from major announcements about the emergency’s status to hyperlocal details about your specific neighborhood. Having access to both types of information helps you react quickly, adapt your plan as needed, and move with confidence during a stressful time. It transforms you from a passive recipient of news into an active, informed participant in your own safety.
Official Alerts and Warning Systems
Your first and most crucial sources of information are the official agencies managing the emergency. These organizations, like your local emergency management office and the National Weather Service, have direct access to data and are responsible for issuing formal guidance. Before a disaster strikes, take time to find and follow their accounts on social media and sign up for your community’s official alerts. Many communities use systems that send texts and automated calls directly to your phone. Also, consider getting a battery-powered or hand-crank NOAA Weather Radio, which broadcasts alerts even if power and cell service are down. Think of these as your non-negotiable sources of truth during a crisis.
Real-Time Coordination Apps
While official alerts provide the big-picture directives, technology now allows for a more connected and granular response. Modern apps can turn your phone into a powerful tool for safety and coordination, bridging the gap between official announcements and what’s happening street by street. Platforms like PubSafe allow you to see a public map of user-reported incidents, giving you a real-time view of hazards in your area. You can share your own status, find help, or coordinate with volunteer teams. By connecting citizens, first responders, and aid organizations, these tools help fill information gaps and empower communities to work together. Install the free PubSafe app to see how you can stay connected during an emergency.
Returning Home After an Evacuation
The immediate danger has passed, and you’re anxious to get back to normal. But returning home after an evacuation is a process, not a single event. It requires patience and a careful approach to ensure your family’s safety. Rushing back can expose you to new dangers, from structural damage to unseen environmental hazards. Taking the time to follow a few key steps will make your return smoother and safer for everyone. Think of it as the final, crucial stage of your evacuation plan.
Wait for the Official “All-Clear”
The urge to go home is strong, but it’s critical to wait for the green light from emergency officials. They are the ones assessing infrastructure, checking for gas leaks, and clearing roads. Returning before they give the official “all-clear” can put you and your family at risk and may even interfere with emergency response efforts. Before you travel, Ready.gov advises you to talk with local officials to confirm that your area is safe. You can also use community platforms like the PubSafe public map to monitor real-time conditions and official updates in your neighborhood.
Assess for Damage Before You Go Inside
Once you get the go-ahead, approach your home with caution. Disasters can cause hidden damage. Before you even step inside, do a careful walk-around of the property. Look for downed power lines, cracks in the foundation, or other signs of structural damage. When you open the door, be alert for the smell of gas or anything else that seems out of place. If you smell gas or see frayed wires, leave immediately and contact the utility company. You can report incidents and damage through apps like PubSafe, which helps authorities get a clear picture of the situation on the ground.
Reconnect with Your Community
After a disaster, your community is your greatest asset. As you settle back in, make it a point to reconnect. First, let your family and friends know you’ve returned safely. A quick text or call can ease a lot of worry. Then, check on your neighbors, especially those who might need extra help, like the elderly or families with young children. Recovery is a team sport. Sharing information, lending a hand, or simply offering a listening ear strengthens community bonds. This is also a time when organized volunteer coordination becomes essential for rebuilding and supporting one another.
Keep Your Evacuation Plan Ready
An evacuation plan isn’t a “set it and forget it” document. Life changes, and so do the details of your plan. Kids grow up, you might move, or new community resources become available. Regularly reviewing and updating your plan ensures it remains practical and effective when you need it most. Think of it as a living document that evolves with your family. Keeping your plan current and your resources stocked is just as important as creating it in the first place. This proactive approach turns a piece of paper into a powerful tool for safety and peace of mind.
When to Review and Update Your Plan
The best time to create your evacuation plan is before a disaster strikes. Once you have it, don’t just file it away. Make it a habit to review your plan at least once a year. A good time to do this is during a specific season, like the start of spring or fall, or during National Preparedness Month in September. You should also update it whenever your family situation changes, for instance, if you move, have a new baby, or get a pet. Sharing the written plan with everyone in the household makes it more likely to work smoothly. A quick annual review keeps everyone on the same page and ensures your plan is always ready.
Tools and Resources for Preparedness
Beyond your written plan, having the right tools is crucial. Experts recommend an “emergency evacuation kit,” often called a “72-hour kit.” This should have enough food, water, and supplies to last for three days. For real-time information, find trusted sources like your local emergency agencies and the National Weather Service. You can also install the free PubSafe app to receive alerts, find help, and report incidents in your area. Having these resources ready means you can react quickly and confidently, knowing you have the support and supplies you need to stay safe during an evacuation.
Related Articles
- 10 Essential Tips For A Safety Plan: Join The Citizen Safety Community
- Safety Plan Tips for Travel & Adventure | Free Guide – PubSafe
- Flood Emergency Response And Preparedness
- PubSafe Mobile App for Emergency Action Plans & Management
- PubSafe Mobile App for Emergency Action Plans & Management
Frequently Asked Questions
How is an evacuation different from a “shelter-in-place” order? That’s a great question, as the two instructions require opposite actions. An evacuation order means the safest thing you can do is leave the area because of a threat like a wildfire or flood. A shelter-in-place order, however, means the danger is outside, so you should stay inside and seal your home from contaminants. This is common during a chemical spill or a severe tornado warning. Always listen carefully to official instructions to know which action to take.
What if I don’t have a car? How can I evacuate? This is a critical part of planning. If you don’t have personal transportation, your plan should include other options. Connect with neighbors, friends, or family who live nearby and agree to be evacuation buddies. You can also contact your local emergency management office ahead of time to learn about public transportation plans for evacuations, as many communities arrange for buses or other transport from central locations.
My family members are scattered during the day. How can we possibly meet up? This is a common worry, and it’s why your plan needs two types of meeting spots. The first should be just outside your home for sudden events like a fire. The second should be a familiar landmark outside your neighborhood, like a specific library or park, in case you can’t get back home. The key is making sure everyone, including kids, has the address memorized and has a central out-of-state contact to check in with, since long-distance calls are often more reliable than local ones.
What’s the most important thing to grab if I only have a few minutes to leave? If you have very little time, focus on the essentials for survival and recovery. Grab your pre-packed emergency kit, your wallet, your phone, and any necessary medications. If you have another minute, take your folder of important documents. This is why having a go-bag packed and ready by the door is so important; it contains all the other critical items, so you don’t have to think about them in a moment of panic.
Why do I need an app like PubSafe if I’m already getting official alerts? Official alerts are your primary source for big-picture commands, like when to evacuate. A real-time coordination app complements that information with on-the-ground details. While officials broadcast the main evacuation routes, an app can show you a user-reported road closure or hazard on a side street. It allows you to see what your neighbors are reporting and share your own status as “safe,” which reduces the strain on communication lines and gives your loved ones peace of mind.